


Below is a precise electrical method of statement for installation & testing of Lightning Protection Earthing & Bonding System. The method is very useful for site engineers and electricians to conduct site activities without fail.
Arrange following tools before starting the work for earthing, bonding and lightning protection system installation and testing:
- Hacksaw Frame and Blade
- Ladder
- Sprit Level
- Sand Paper and Files
- Measuring tape
- Meggar for earth testing
- Spanners
- Hammer
- Screw driver
- Exothermic welding tool kit
- Moulds
- Cable
- Powdered metal
- Gloves
- Eye protection
Material Storage & Handling
On receipt of the Lightning Protection System materials at site necessary precautions shall be taken for unloading, shifting and storage, as follows:
- Material shall be stored in a covered / dry space at all the time to avoid being damaged.
- All materials received at site shall be inspected and ensured that the materials are as per approved material submittal.
- Any discrepancies, damage etc., found will be notified and reported for further action.
- Material found not suitable for site use will be removed from site immediately.
Cleaning & Preparation of Earthing Materials
The surfaces of all conductors etc. to be welded must be clean, dry & bright. Oil and grease may be burned out with a butane/acetylene torch or cleaned with a rapid-drying solvent such as Methylene Chloride. After cleaning use a cable brush or card cloth brush to remove any residue and brighten the surfaces.
Corroded cable must be cleaned. It is especially important that the ends of the individual strands are clean; this can best be achieved by making a fresh cut on the end of the cable.
Bent or out-of-round cable will hold the mould open and cause leeks; therefore, the cable must be straightened before clamping the mould into place. Remove any insulation before cutting to prevent insulating material becoming trapped in the strand-ends.
Use a file, emery cloth or card brush to remove oxides. On tubes, clean the inside surface as well as the outside end.
Remove rust and all scale with a rasp, coarse file or grinder (not resin-bonded). Galvanised surfaces may be cleaned with emery cloth to remove oxide film; it is not necessary to remove galvanising. For cast iron less than 12mm thick do not use larger than powder no. 65. Use only P2 powders for cast iron; do not use regular powders. Under some conditions of temperature and humidity, the surface to be welded will sweat, causing porous welds. This can be eliminated by warming the surface with a hand torch.
Ends that are threaded, ‘mushroomed’ from driving or drilled and tapped must be cut off. Undersized rods may be built up with copper shim. Use a grinder to remove all mill scale and rust front the rail surface, (wire-brushing is inadequate), and to remove any raised lettering on the rail web.
Earthing & Lightening Protection System Installation Sequence
The installation team shall use 25 x 3 mm copper tape to form the air-termination mesh on the uppermost part of the building structure i.e. roof. Complete earthing tape network shall be bonded to all down conductors around the periphery and a branch conductor to be taken horizontally and all these down conductors to be bonded by using approved clamps.
- Number of down conductors shall be based on the technical earthing calculation or shop drawings.
- When different metal to be connected a bimetallic clamp shall be used.
- Any roof (e.g. staircase) on top of the main roof shall have air termination network and it shall be connected to lower roof network. The DC earth tape clamp shall be fixed on the route as shown in the approved shop drawings and the straightness shall be checked along with building finish, on the top roof high level.
- All the fixing clips for the copper tape shall be metallic (complying with Class ‘H’ of the electrical testing based on BSEN 50164) and shall be fixed at an interval of 1000 mm fixing distance for fixing conductors on vertical surface up to 20m from the ground level and on the horizontal surface i.e. roof.
- The down conductors shall be placed around the building as per approved drawing. A minimum of two re-enforcing bars shall be used as down conductors in each column. The minimum overlap dimension to connect two re-bars shall be at least 20 times the diameter of the re-bar. If it not practical to arc-weld two re-bars then suitable clamps should be used at a distance of each 10cm till the above dimension is achieved.
- Re-enforcement bars in the designated columns should be used as down conductors, with a suitable junction box to be recessed at approx. 1000 mm above the finished paving level for the test link.
- The electrical continuity of the reinforcing bars shall be determined by electrical testing between the uppermost part and the ground level.
- The overall electrical resistance of earthing system should not be greater than 0.2 Ω, measured using test equipment suitable for this purpose. If this value is not achieved, or it is not practical to conduct such testing, the reinforcing bar shall not be used as a natural down conductor.
- Bond each copper down conductor throughout its length to the building reinforcement bar with spacing not more than 1.5 meter. All bonding to reinforcement bar shall be by using manufacturer’s standard materials and tools for the same.
- Thermo weld all connections between cables, aerial terminals and ground rods. Compression type connectors may be used where approved by the consultant.
- The earthing shall be done as per local authorities requirements.

- Measure the resistance of the complete installation and submit for review to consultant/client.
- The complete Lightning Protection System measured at any point, should not exceed 10 ohms. With the test clamp disconnected, the resistance of each individual earth should be no more than ten times the number of down conductors in the complete system.
- The terminated head of each electrode shall be located in a light weight inspection pit. If clear earth is not available, then the Specialist Lightning Protection Installer has to install the earth pit inside the building using double flange earth electrode seals.
- Test clamps shall be provided in each inspection pit to allow for testing and commissioning.
- Concrete inspection pits with cover shall be installed flush with finished floor level and be fully accessible.
- All metallic parts protruding outside the extended air termination network (e.g. balcony hand rails etc) shall be connected to the air termination using suitable clamps (material complying to BSEN 50164) at every floor wherever the horizontal conductor is applied.
- The equipments on the roof shall be protected using vertical air terminals of suitable height so that it provides the zone of protection. This air terminal shall be installed at a suitable separation distance so that the partial lightning current doesn’t flow through the equipment as per approved shop drawing. The cable from the equipment shall be protected using an over – voltage protector.

Installation of LV Earthing System
- As per approved shop drawings identify location of concrete earth pits.
- MEP contractor will coordinate with main contractor for installation of concrete earth pits and copper tape running under cladding and on the roof with approved fixing details.
- UPVC duct shall be checked for suitability, which is provided by the raft structure contractor for grounding and bonding and pulled through with Nylon rope.
- The U pvc duct shall be further extended upto concrete earth pit.
- The earth rod will be driven manually into earth. After driving two rods the earth resistance will be measured. If the earth resistance value is not satisfactory, the process of adding further earth electrodes shall be continued until the resistance value less than 1 ohm is achieved for electrical earth.
- The earth pit shall be installed after completion of installation of earth rods and a clear gap of 50 mm shall be maintained between top of earth electrode and earth pit cover. The top of earth pit shall be in level with the finished floor level in the area.
- The 25 x 3 Copper tape shall be laid between the earth pit and the earth bar inside the building and terminated with proper
- The joint between the earth terminal and the earth electrode shall be wrapped with Denso tape to avoid corrosion.
- All earthing connections shall be made after cleaning the surfaces thoroughly and tightness checks for each connection shall be performed. An appropriate connection will be used for connections where dissimilar metals are used.
- Continuity of earth connections shall be checked for every link in the network.
- The down stream earthing connections from earth bars shall be made to the panel boards, frames and other equipment as per approved shop drawings.
- In substation, the neutral of each transformer will be earthed separately with dedicated earth pits and proper marking shall be done over the earth pit.
- On completion of total earthing system, testing reports will be submitted for approval.
- Dedicated earth pit will be installed for communication equipment’s as required by the specialist system.

Installation of Equipotential Bonding
- The metallic frame of all electrical equipment’s shall be connected to the nearest earth bar with a specified size of earth cable.
- The earthing continuity of cable trays and trunking shall be maintained with earth links. (i.e. cable trays and trunking )
- Flexible tinned copper earthing braid/earth cable spiral shall be used for the earthing connections when there is possibility of expansion / contraction and also where vibrating equipment is installed.
- The metallic water lines shall be bonded with purpose made clips flat wound tight on it and earthed by an earthing cable of size not less than 6m2
- All bonding connections shall be checked for correct tightness and cleanliness.
- Work Inspection Request shall be raised for Consultant’s inspection and sign off.
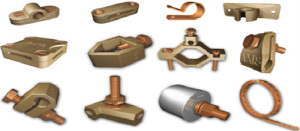
Furse Welding Procedure for Earthing System
Position the cleaned conductors in the mould after ensuring the mould is dry by pre-heating or making a test joint. Lock the mould with the handle clamp; if the mould does not close properly adjust the tension by removing the split pin and turning the eye bolt accordingly.
Insert the steel disc into the mould crucible, ensuring it is centered over the tap hole. Pour the welding powder into the crucible; the starting powder will be retained in the base of the cartridge and can be loosened by tapping the cartridge on the ground. Spread the starting powder evenly over the welding powder, placing a small amount on the top edge of the mould for easy ignition. Close the cover and ignite the starting powder with the flint gun; pull the gun away immediately to prevent fouling the flint.
Wait a few seconds to allow the metal to solidify before opening the mould. Remove all slag and dust before making the next weld.


General Note: For all cable to surface application it may be advisable to secure the mould to the surface by means of a “G” Clamp.


Testing Of Earthing & Lightening Protection System
- On completion of the installation the following isolated and combined testing measurement and / or checks has to be made and the results recorded in a lightning protection system checklist.
- The resistance to earth of each local earth electrode and in addition the resistance to earth of the complete earth termination system.
- Each local earth electrode has to be measured in isolation and the test point between the down conductor and the earth electrode in the disconnected position (isolated measurement)
- A further measurement has to be taken with the test point in the connected position (combined measurement)
- The results of visual check of all conductors, bonds and joints and their measured electrical continuity.
- If the resistance to earth of a lightning protection system exceeds 10 ohms, the value must be reduced. Necessary remedial action needs to be taken to reduce the value below or equal to 10 ohms.